How Long Does Diamond Painting Take? A Complete Guide

One of the first questions many people ask before starting a diamond painting is:

“How long will it take me to finish it?”

There isn’t one exact answer because every diamond painting is different.

A small, simple design may take only a few hours or a few sessions, while a large, highly detailed painting can become a project that you work on for weeks or even months.

The time depends on the size of the painting, the amount of detail, the number of colours, your experience and how often you work on it.

This guide explains what affects diamond painting completion time and how you can estimate how long your next project might take.
How Long Does a Diamond Painting Take to Complete?

A diamond painting can take anywhere from a few hours to many weeks or months to complete.

There is no standard completion time because people work at very different speeds.

For example, someone who works on their painting for an hour every evening will obviously finish sooner than someone who only works on it for an hour or two on weekends.

The size of the painting also makes a major difference.

A small project with a simple design requires far fewer drills than a large, detailed portrait.
What Determines How Long a Diamond Painting Takes?

Several factors affect how long your diamond painting will take.

The most important are:

  • The size of the painting
  • The amount of detail
  • The number of drills
  • The number of colours
  • Your experience
  • How quickly you place the drills
  • How often you work on the painting
  • How organised your workspace and drills are

Let’s look at each one.

1. The Size of the Diamond Painting

The size of your painting is one of the biggest factors affecting completion time.

A small painting simply contains fewer areas to cover than a large painting.

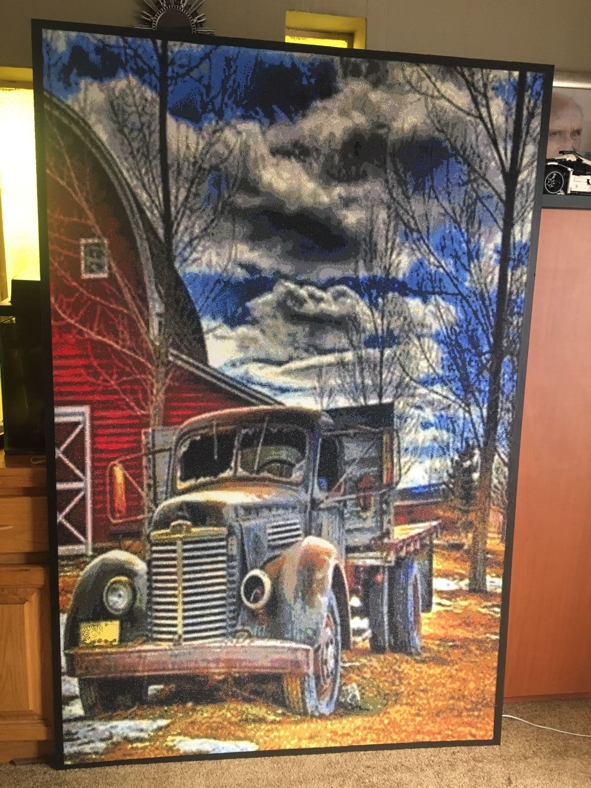
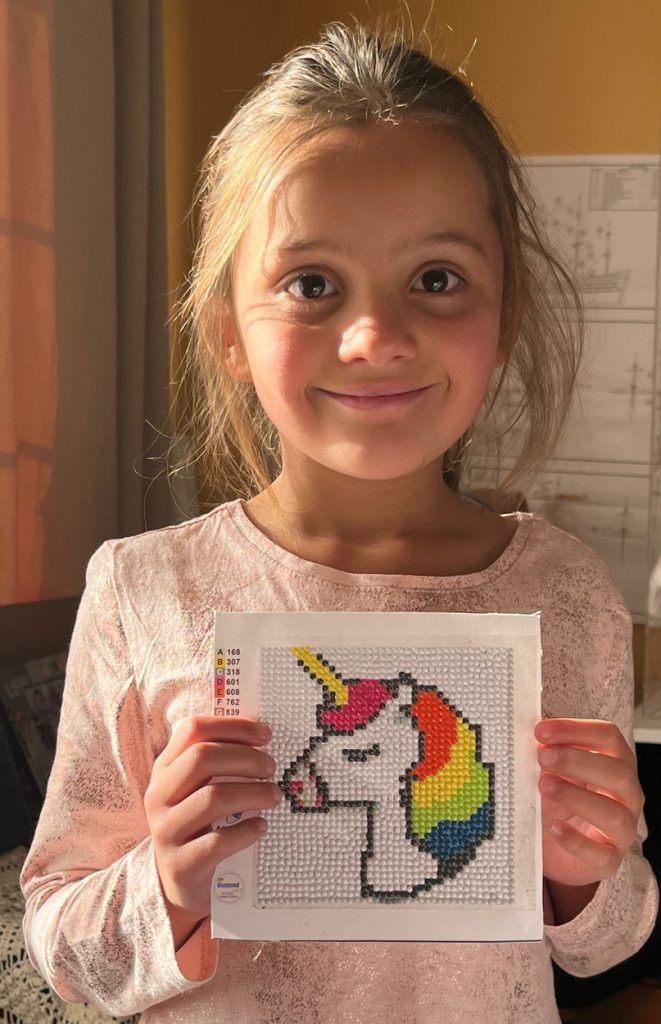
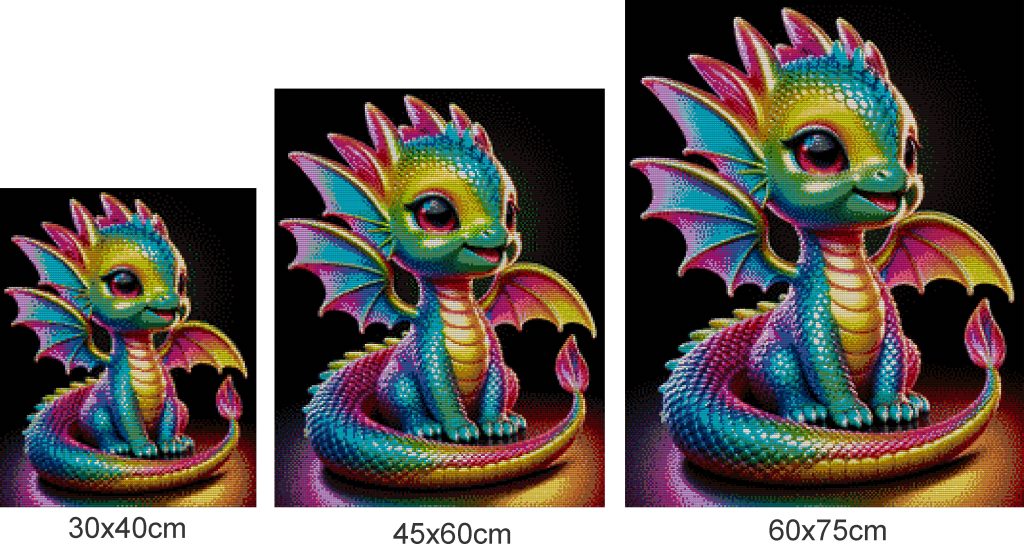
For example, a small children’s project may be relatively quick to complete, while a large wall-sized artwork can take a considerable amount of time.

This is one reason it is important to think about the amount of time you have available when choosing your next project.

If you’re new to diamond painting, starting with a smaller project can help you learn the process without committing yourself to a very large painting.

You can read our guide to choosing the right diamond painting size for more information.
2. The Amount of Detail

Two paintings of exactly the same physical size can take different amounts of time to complete.

A simple design with large areas of similar colours may be quicker to work on than a highly detailed image containing many small features and colour changes.

Portraits are a good example.

A detailed portrait may contain many different shades in the face, hair, clothing and background.

This means you may need to switch between colours frequently while working.

3. The Number of Drills

Every drill you place takes time.

The larger the painting, the more drills you will generally need to place.

A small painting may contain thousands of drills, while a large painting can contain many more.

This is why a large diamond painting can become a long-term project.

The good news is that you don’t have to complete all those drills at once!

4. The Number of Colours

The number of colours in a painting can also affect how quickly you work.

If you are working on a large area of one colour, you can often place many drills without constantly changing colours.

A detailed image with many different colours may require you to stop frequently, find another colour and change your tray.

This can slow down the process.

It isn’t necessarily a bad thing, though.

Many diamond painters actually enjoy detailed designs because of the variety involved.

5. Your Experience

Your first diamond painting will probably take longer than your fifth or tenth.

When you’re learning, you need to think about:

  • Which symbol you’re looking for
  • Which colour matches the symbol
  • How much wax to use
  • How to position the drill
  • How to organise your drills
  • How to work without damaging the adhesive

After completing a few paintings, many of these things become automatic.

You will naturally become faster and more confident.

Don’t worry if your first painting feels slow.

You’re learning a new skill.

6. How Quickly You Place the Drills

Everyone has a different working speed.

Some people carefully place each drill individually.

Others develop a faster rhythm once they become comfortable with the process.

Your speed can also depend on the type of design you’re working on.

Large blocks of the same colour can sometimes be completed quickly, while detailed areas with lots of colour changes can take longer.

There is no correct speed.

Diamond painting is supposed to be enjoyable, so you don’t need to race through your project.

7. How Often You Work on Your Painting

This can make an enormous difference to the total calendar time.

Someone who works on their painting every day may finish it relatively quickly.

Someone who only works on their painting on weekends may take considerably longer.

You can make diamond painting fit around your schedule.

You could work for:

  • 15 minutes
  • 30 minutes
  • One hour
  • Several hours

Whatever works for you.

Even a small amount of progress adds up over time.

How Long Does a Small Diamond Painting Take?

Small diamond paintings are generally a good option for beginners because there are fewer drills to place.

The actual time will depend on the design and the person completing it.

A simple small project may be completed over a few sessions, while a more detailed small painting may take longer.

If this is your first diamond painting, choosing a smaller project can be a good way to learn how you enjoy working before moving onto something larger.

You can explore Diamond Art SA’s small diamond painting designs if you’re looking for a smaller project.

How Long Does a Large Diamond Painting Take?

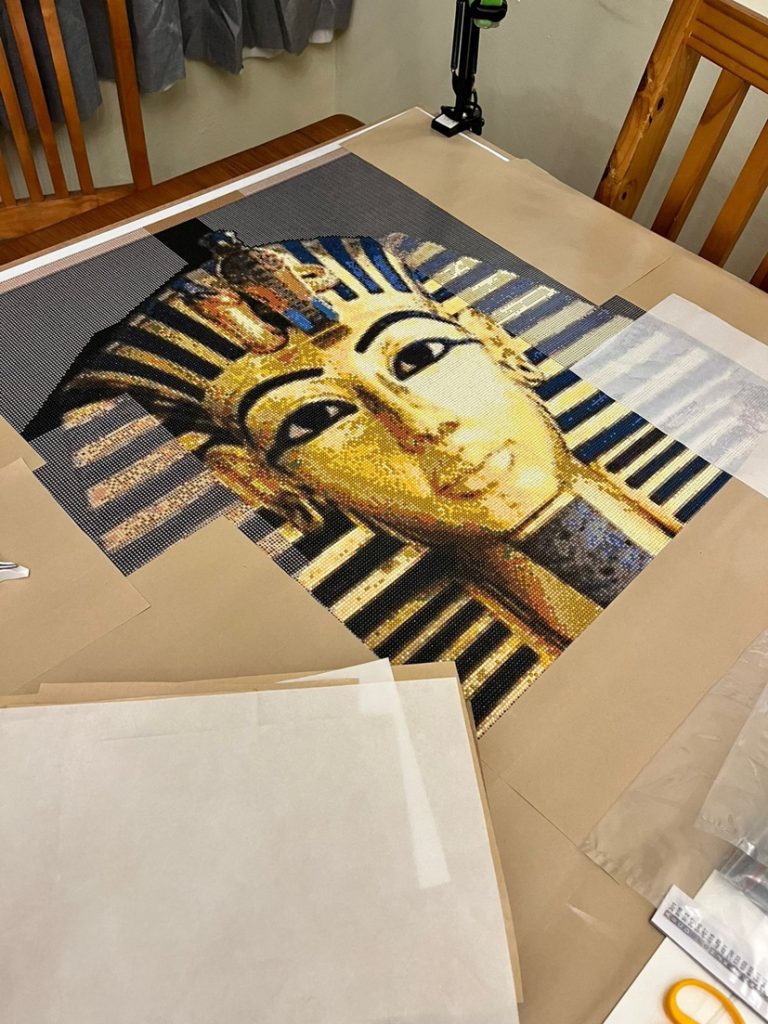
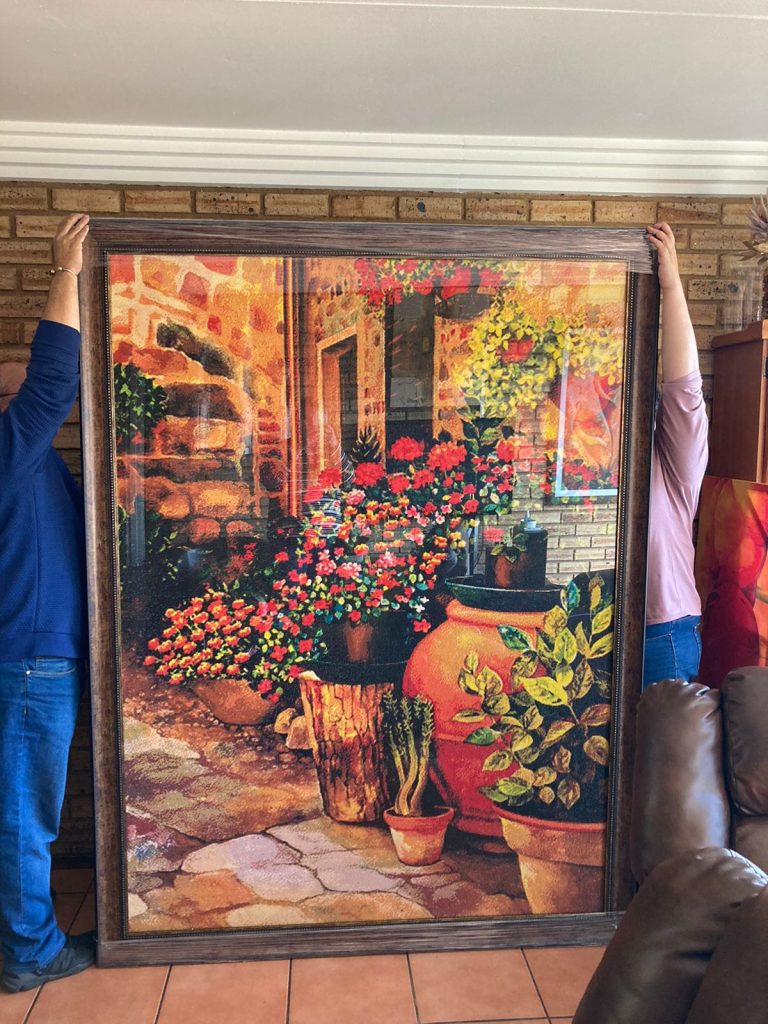
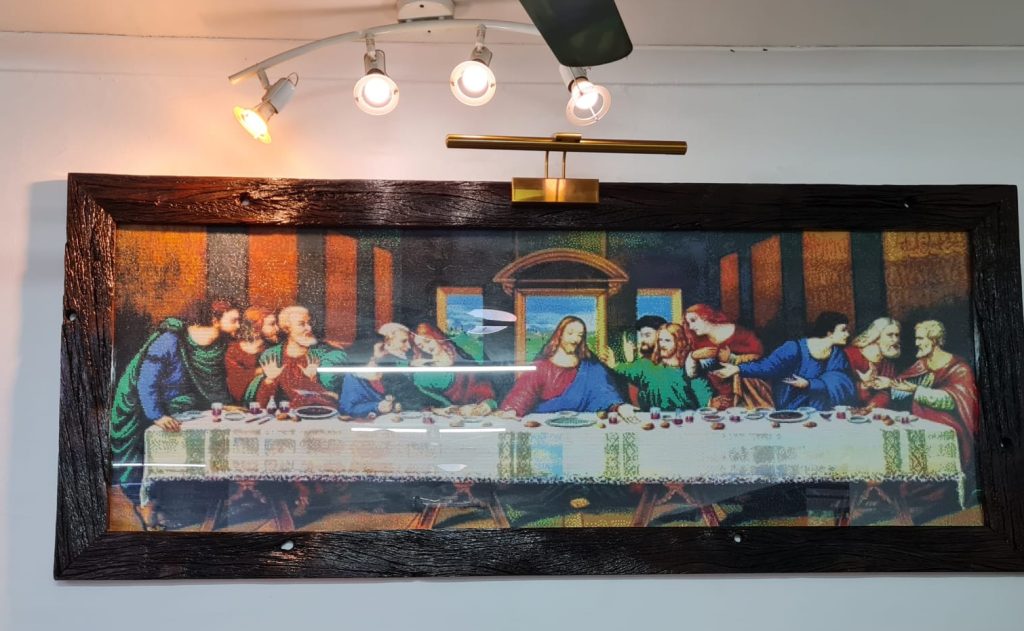
Large diamond paintings can take considerably longer.

The larger the image, the more drills you have to place.

If the image is also highly detailed, you may have many colours and small areas to work through.

A large painting can therefore become a project that you work on over many weeks or even months.

For some diamond painters, that’s actually part of the appeal.

Instead of rushing to finish, the painting becomes a relaxing hobby that you return to regularly.
How Long Does a Custom Diamond Painting Take?

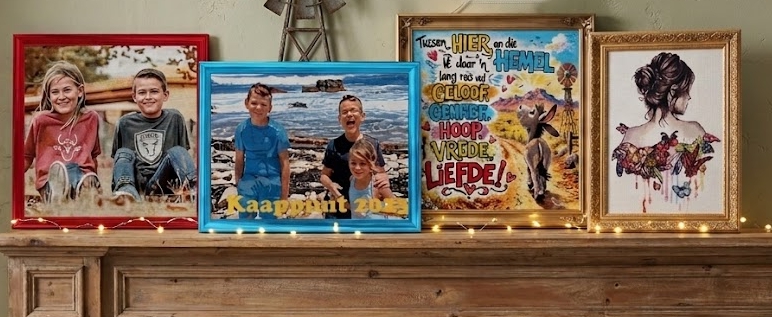
Custom paintings can take longer to prepare because they are made from your own photograph.

There is a preparation process before the canvas can be produced.

At Diamond Art SA, custom photographs can be assessed and a sample layout can be provided before proceeding.

For custom paintings that are made to order, please allow approximately 15–25 working days for preparation before delivery.

This is the preparation time before you receive the painting, not the amount of time it takes you to complete it.

Once you receive your custom painting, your personal completion time will depend on the size, detail and how often you work on it.

You can read our complete guide to custom diamond paintings to learn more.

How Can I Complete My Diamond Painting Faster?

If you enjoy working quickly, there are several things you can do to make the process more efficient.

Keep Your Drills Organised

If you constantly have to search for colours, you’re going to spend more time organising than painting.

Keep your drills clearly separated and labelled.

Work in Small Sections

Don’t expose the entire canvas at once.

Work on a manageable area and gradually move across the painting.

Use Good Lighting

Being able to clearly see the symbols makes the process easier and can reduce mistakes.

Prepare Your Workspace

Keep your tray, applicator, wax and drills within easy reach.

A tidy workspace can make your painting sessions much more enjoyable.

Take Regular Breaks

Working for hours without a break isn’t necessarily going to make you finish faster.

If your eyes or hands become tired, take a break and come back later.

Should I Try to Finish My Diamond Painting Quickly?

Not necessarily.

One of the best things about diamond painting is that you don’t have to rush.

For many people, the enjoyment comes from the process rather than simply reaching the finished painting.

You can work on your painting while:

  • Listening to music
  • Watching television
  • Listening to a podcast
  • Listening to an audiobook
  • Chatting with family
  • Relaxing after a busy day

Your diamond painting can be something you look forward to rather than another task that needs to be completed.

How Do I Know What Size Painting I Can Handle?

Think about how much time you realistically have available.

If you only have a short amount of free time each week, a smaller project may be more enjoyable.

If you love large projects and enjoy working on the same painting for months, a large detailed design may be exactly what you’re looking for.

There is no “right” size.

The best size is the one that suits your available time, workspace and patience.

Can Children Finish a Diamond Painting?

Yes, but the project should be appropriate for the child’s age and ability.

A small and relatively simple project can be a good introduction for younger diamond painters.

Large, highly detailed paintings may require more patience and concentration.

Diamond drills are also very small pieces, so younger children should always be supervised appropriately.

Diamond Art SA offers small diamond painting projects that can be suitable for children and beginners.

Why Larger Paintings Can Take Longer

It can be tempting to think:

“If I want more detail, I’ll just buy a bigger painting.”

That’s true in terms of allowing more space for detail, but it also means you will have many more drills to place.

A larger painting requires:

  • More workspace
  • More storage
  • More drills
  • More time
  • More patience

Before ordering a large painting, make sure you have somewhere suitable to work on it and store it between sessions.

How Long Does It Take to Get Good at Diamond Painting?

You can learn the basic technique very quickly.

Your first few sessions may feel slow because you’re learning how everything works.

With practice, you’ll become more comfortable with:

  • Identifying symbols
  • Handling drills
  • Using your applicator
  • Organising colours
  • Working in sections
  • Positioning drills accurately

Your speed will naturally improve as you gain experience.

But remember that being fast isn’t the goal.

A neat, enjoyable painting session is more important than how many drills you can place in an hour.

A Simple Way to Estimate Your Completion Time

If you want to estimate how long your own painting might take, think about three things:

1. How large is the painting?

Larger = generally more drills.

2. How detailed is the image?

More detail and more colours can mean slower progress.

3. How often will you work on it?

Daily sessions will obviously produce faster calendar-time completion than occasional sessions.

For example:

30 minutes a day × 5 days a week

will give you approximately 2½ hours of diamond painting each week.

Even if you only complete a small section during each session, you’ll gradually see the painting come together.

Don’t Compare Your Speed With Other Diamond Painters

You may see people online saying they completed a particular painting extremely quickly.

Don’t worry if yours is taking longer.

Everyone has a different working speed.

Your experience level, the design you’re working on and the amount of time you have available will all be different.

The important thing is to enjoy your project.

Frequently Asked Questions

How many hours does a diamond painting take?

There is no standard number of hours. Completion time depends on the size, detail, number of colours and your personal working speed.

Can I finish a diamond painting in one day?

A small and simple project may be possible to complete in one day, particularly for an experienced diamond painter. Larger paintings generally require considerably more time.

How long does a 50 × 70 cm diamond painting take?

There is no fixed completion time because the amount of detail, number of colours and your working speed all affect the result. A 50 × 70 cm painting can be a substantial project and may take many sessions to complete.

Do bigger diamond paintings take longer?

Generally, yes. Larger paintings contain more areas to cover and therefore require more drills and more working time.

Are small diamond paintings good for beginners?

Yes. A small project can be a good way to learn the basic technique before moving onto larger and more detailed paintings.

Do detailed paintings take longer?

Generally, yes. Detailed paintings can contain more colours and smaller areas that require more careful work.

How can I finish my diamond painting faster?

Keeping your drills organised, working in manageable sections, having good lighting and preparing your workspace can make the process more efficient.

How long do custom diamond paintings take to prepare?

Diamond Art SA currently advises customers to allow approximately 15–25 working days for preparation before delivery for made-to-order paintings.

How long will my custom diamond painting take me to complete?

That depends on the size and detail of the painting and how often you work on it. The preparation time before delivery and the time you personally spend completing the painting are two separate things.

Enjoy the Journey

Diamond painting isn’t just about reaching the last drill.

For many people, the process itself is the enjoyable part.

Watching an image gradually appear as you place hundreds or thousands of tiny drills can be incredibly satisfying.

Whether you choose a small beginner project, a large detailed artwork or a custom diamond painting made from your own photograph, choose a project that you will enjoy spending time with.

If you’re ready to choose your next project, explore the Diamond Art SA diamond painting collection.

You can also read our complete beginner’s guide to diamond painting or learn how to choose the right diamond painting size.
How to Start Diamond Painting: A Complete Step-by-Step Beginner’s Guide

Starting your first diamond painting can seem a little confusing when you open the kit and see a canvas covered in symbols, bags of tiny coloured drills and a collection of unfamiliar tools.

The good news is that diamond painting is much easier than it looks.

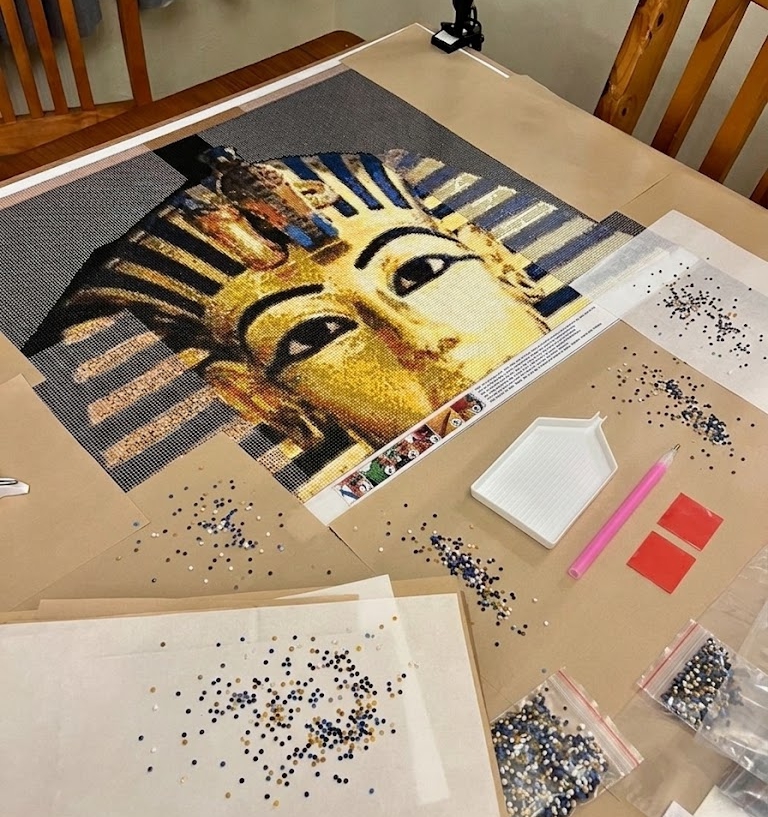
Once you understand what each tool is for and how the symbols on the canvas work, the process is simply a matter of picking up and placing the drills one by one.

This step-by-step guide will show you how to start your first diamond painting, how to use the tools included in your kit, how to avoid common beginner mistakes and how to work your way towards a finished painting.

If you haven’t tried diamond painting before, you may also want to read our complete beginner’s guide to diamond painting first.

What Do You Need to Start Diamond Painting?

A basic diamond painting kit normally contains everything you need to begin.

You will generally need:

  • A diamond painting canvas
  • Coloured resin diamond drills
  • An applicator pen
  • Wax
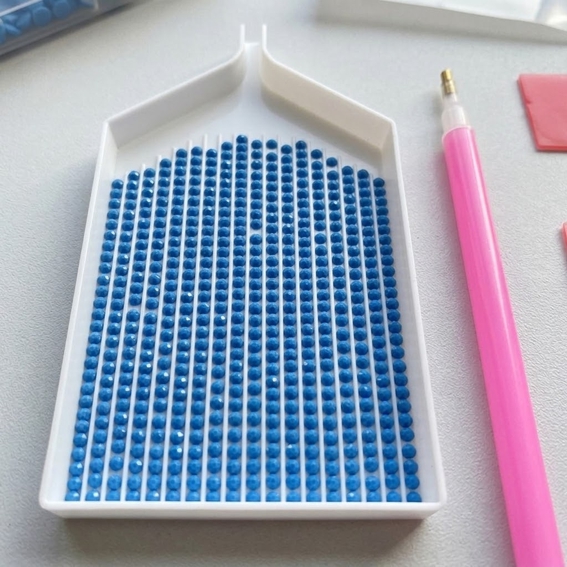
  • A diamond painting tray
  • A colour and symbol chart

You may also find additional tools depending on the particular kit.

As you become more experienced, you can add accessories such as storage containers, tweezers, a light pad, multi-placer tools and other diamond painting accessories.

You don’t need to buy lots of equipment before starting. The basic tools supplied with your kit are enough to learn the technique.

Step 1: Find a Suitable Workspace

Before opening your drills, find a clean, flat surface where you can comfortably work.

Your workspace should have enough room for:

  • Your canvas
  • Your tray
  • Your diamond drills
  • Your applicator pen
  • Your wax
  • Your colour chart
  • Any storage containers you are using

Good lighting is particularly important because the symbols on a diamond painting canvas can be small.

If you are working on a large painting, make sure you have enough space to support the canvas without constantly folding or moving it.

Step 2: Unpack Your Diamond Painting

Carefully remove the canvas and the other contents from the packaging.

Lay the canvas flat on your workspace.

Depending on how it has been packaged, the canvas may have some curling or creasing. Give it time to flatten naturally rather than immediately trying to force it flat.

Keep the protective covering on the adhesive surface while you prepare your workspace and organise your materials.

Step 3: Understand the Symbols and Colour Chart

Before placing your first drill, take a look at the chart supplied with your painting.

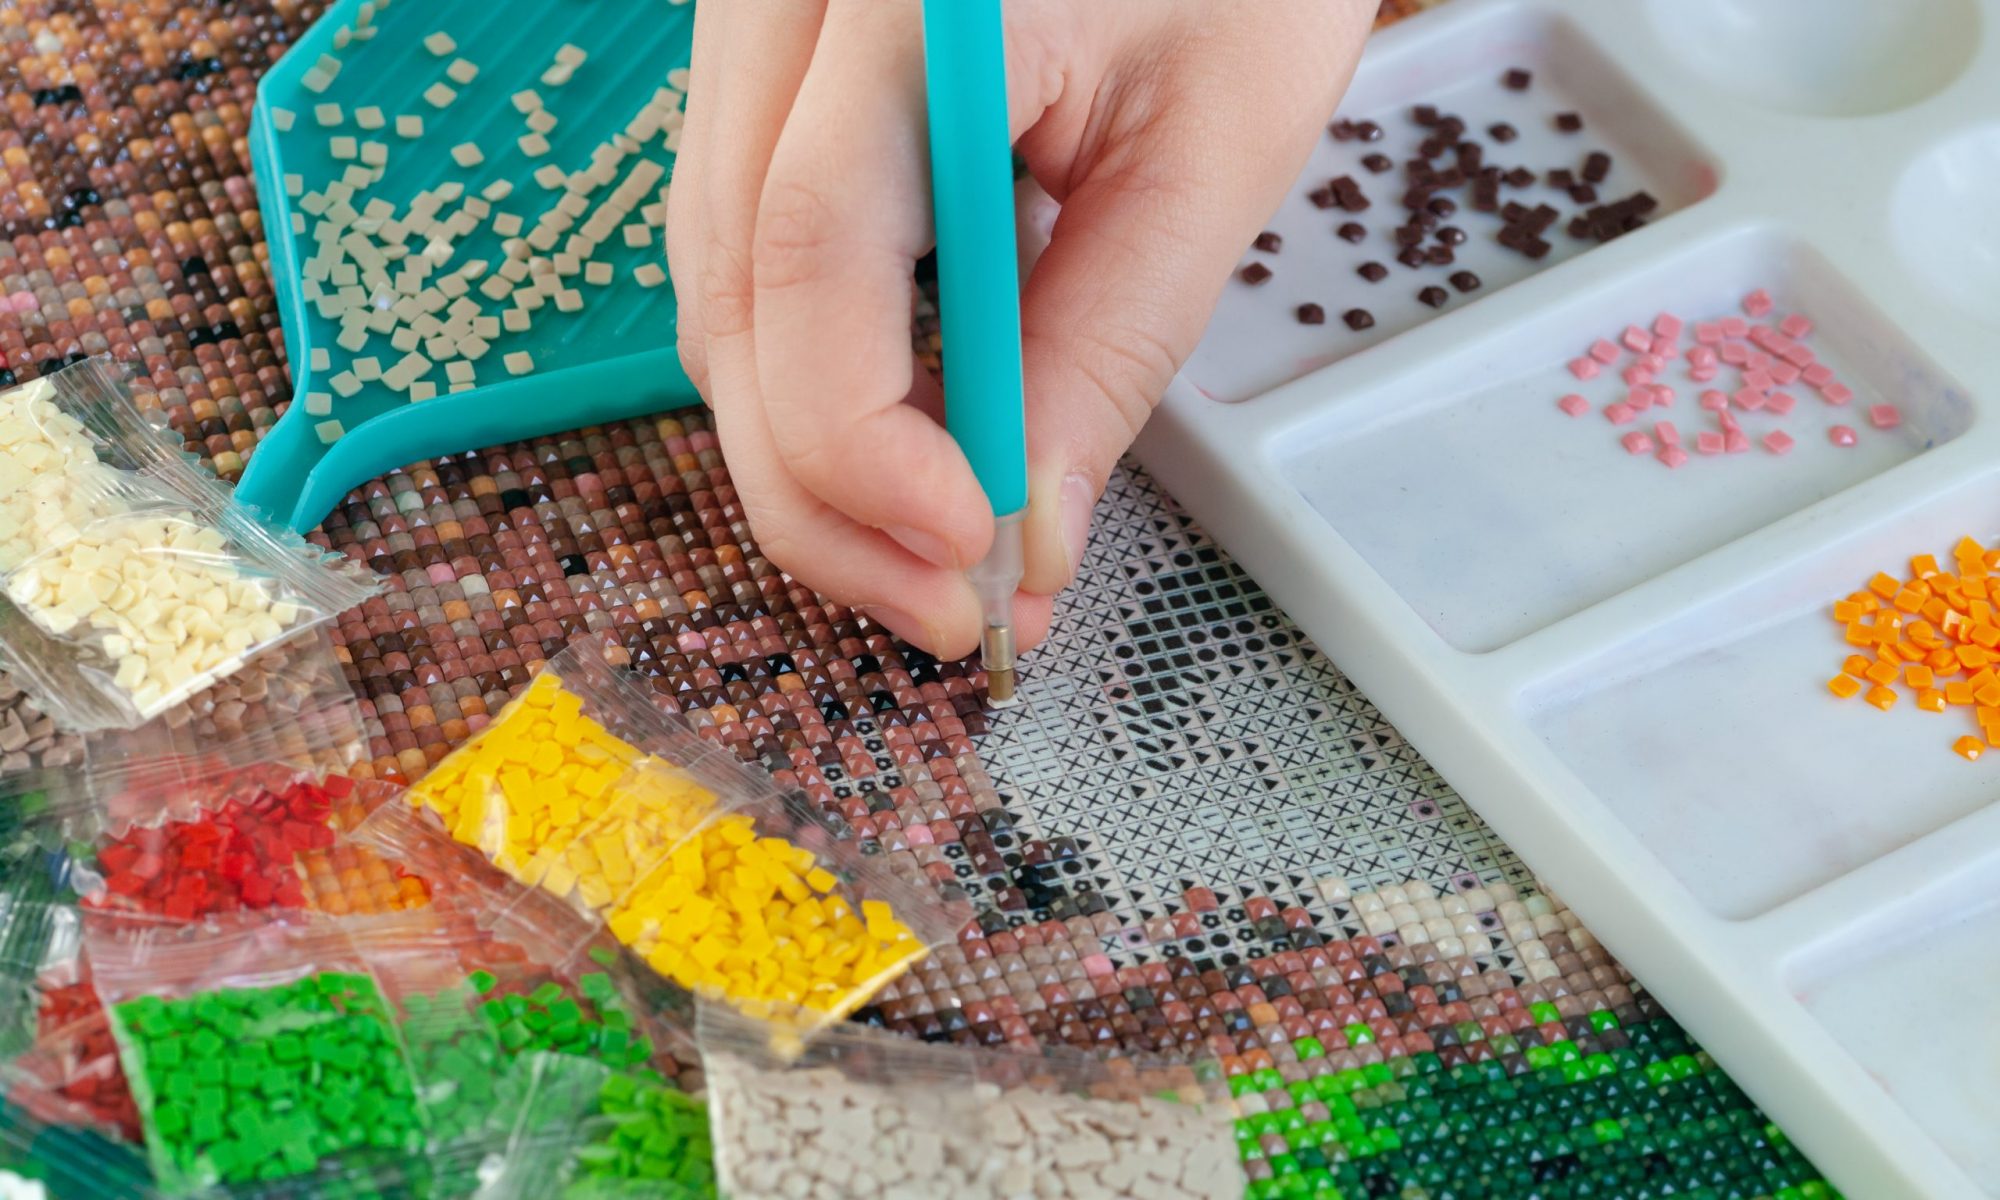
The canvas is covered with symbols, and each symbol corresponds to a particular drill colour.

The chart tells you which colour belongs to each symbol.

For example, one symbol might represent a particular shade of blue, while another symbol represents a shade of green.

Take a few minutes to familiarise yourself with the system before starting. This can prevent mistakes later.

Step 4: Organise Your Diamond Drills

Your drills will usually be supplied in individual bags according to colour.

Keep the different colours organised so that you can easily find the one you need.

If you have storage containers, you can transfer the drills into labelled containers. However, this isn’t necessary for a small project.

For your first painting, you can simply keep the original bags organised and work with one colour at a time.

Be particularly careful with colours that look very similar.

Mixing two similar colours together can make it difficult to separate them again.

We also sell these Storage Holders.

Step 5: Choose the First Section

Don’t try to remove the entire protective covering from the canvas.

Instead, choose a small section to work on and expose only that area.

Keeping the rest of the canvas covered helps protect the adhesive from dust, hair and other debris while you work.

A manageable section also makes the project feel much less overwhelming.

You don’t need to complete an entire painting in one sitting.

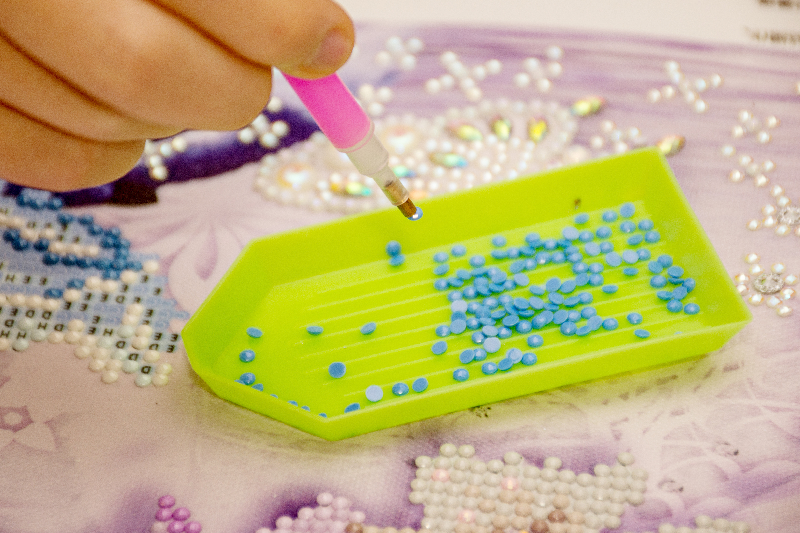
Step 6: Pour Your Drills Into the Tray

Choose one of the colours needed for the section you’re working on.

Pour a small amount of the drills into your diamond painting tray.

Gently shake the tray from side to side.

The grooves in the tray help the drills settle into a position that makes them easier to pick up with your applicator pen.

Don’t fill the tray too much.

Working with a smaller quantity makes it easier to handle the drills and reduces the chance of accidentally spilling them.

Or get one of these trays for more colours.

Step 7: Add Wax to Your Applicator Pen

Your diamond painting applicator pen has a hollow tip designed to pick up the drills.

Press the tip of the pen gently into the wax supplied with your kit.

The wax provides temporary grip, allowing the pen to pick up a drill.

You don’t need to keep adding wax after every drill.

When you notice that the pen is no longer picking up the drills properly, simply add a little more wax.

Step 8: Pick Up Your First Diamond Drill

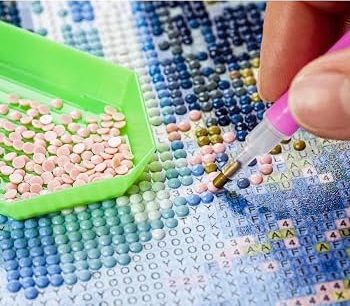
Place the waxed tip of the applicator pen gently onto the top of a drill in your tray.

The drill should stick to the pen.

Lift it from the tray and take it to your canvas.

Now find the symbol on the canvas that corresponds to that particular colour.

Step 9: Place the Drill Onto the Canvas

Position the drill over the matching symbol.

Gently press the drill onto the adhesive.

Lift the pen away.

The drill should remain attached to the canvas.

That’s your first diamond!

It really is that simple.

Continue picking up drills and placing them onto the corresponding symbols.

Step 10: Work Methodically

There isn’t one single correct way to work through a diamond painting.

Some people like to complete one colour at a time within a section.

Others prefer to work across a row or small area and place whichever colour is required as they go.

Try both approaches and see which feels more comfortable for you.

The important thing is to work in manageable sections and keep track of which colours you are using.

Step 11: Keep the Rest of the Canvas Covered

As you finish a section, move on to the next area and expose only as much of the adhesive as you are ready to work on.

Avoid leaving large areas of adhesive exposed unnecessarily.

Dust, fibres and other debris can settle on the sticky surface and make it more difficult to place the drills.

Keeping the protective covering in place until you need the next section is one of the easiest ways to keep your canvas clean.

Step 12: Check Your Work as You Go

Before moving too far away from a completed section, check your work.

Look for:

  • Missing drills
  • Incorrect colours
  • Drills that are sitting crooked
  • Symbols that have accidentally been skipped
  • Loose drills

It is much easier to correct a mistake while you are still working on that section than to discover it when the entire painting is finished.

If you notice that you have placed the wrong drill, carefully remove it and replace it with the correct colour.

Step 13: Continue Section by Section

Now simply repeat the process:

Choose a colour → put the drills in the tray → add wax to the pen → pick up a drill → match the symbol → place the drill.

Then repeat.

As you continue, the image will gradually appear.

This is one of the most satisfying parts of diamond painting because you can watch the picture develop from a collection of symbols into a finished piece of artwork.

Step 14: Take Breaks

You don’t have to finish your painting in one session.

In fact, large diamond paintings can take many sessions to complete.

If you are working for a long period, take regular breaks and give your eyes and hands a rest.

When you stop for the day, make sure the unfinished area is protected.

Step 15: Finish Your Painting

Continue working through the canvas until all the required symbols have been covered with drills.

Once you believe you have finished, take a close look at the entire painting.

Check for:

  • Missing drills
  • Incorrect colours
  • Loose drills
  • Areas that haven’t been completed
  • Drills that need repositioning

Once you’re happy with the result, your diamond painting is ready to be protected and displayed.

Common Diamond Painting Mistakes Beginners Make

Removing the Entire Protective Cover

One of the most common mistakes is removing the whole protective covering at the beginning.

You don’t need to do this.

Work on one small section at a time and keep the remaining adhesive covered.

Mixing Different Drill Colours

Be careful when working with colours that look similar.

Keep your drill bags or containers clearly separated and labelled.

Pouring Too Many Drills Into the Tray

You only need a small amount at a time.

A tray overflowing with drills is harder to manage and easier to spill.

Working Without Enough Light

If you struggle to see the symbols, improve your lighting before continuing.

A well-lit workspace can make a big difference, especially when working on detailed paintings.

Rushing

Diamond painting is not a race.

Trying to work too quickly can lead to misplaced drills, missed symbols and frustration.

Take your time and enjoy the process.

Leaving Mistakes Until the End

If you notice an incorrectly placed drill, fix it while the section is still in front of you.

It’s much easier than trying to find mistakes after the entire painting has been completed.

Tips for Making Diamond Painting Easier

Once you’ve completed your first project, you will probably discover your own preferred way of working.

Until then, these tips can help:

Work in Small Sections

Don’t expose more canvas than you can comfortably complete.

Keep Your Drills Organised

Good organisation becomes increasingly important as your paintings become larger and contain more colours.

Use Good Lighting

Make sure you can easily see the symbols and colours.

Keep Your Workspace Clean

Small drills can easily disappear if they are dropped onto a cluttered surface.

Keep Unused Drills Safe

If you have leftover drills, keep them labelled and stored rather than throwing them away immediately.

You may need replacement drills or extras for another project.

Take Your Time

The purpose of diamond painting is to enjoy the creative process. There is no need to rush to the finish.

What If a Diamond Drill Won’t Stick to the Pen?

If your applicator pen stops picking up drills, it may simply need more wax.

Press the tip gently into the wax again and try another drill.

If the problem continues, check that the tip is clean and that you are touching the correct part of the drill.

What If I Put the Wrong Drill on the Canvas?

Don’t panic.

If you notice that you’ve used the wrong colour, carefully remove the drill and replace it with the correct one.

This is much easier to fix while you are still working on the area.

What If I Run Out of a Colour?

If you think you may be running low on a particular colour, check your remaining supplies before continuing.

Keep your leftover drills organised so you know which colours you have available.

Diamond Art SA also offers diamond painting tools, accessories and supplies, including additional supplies that may be useful to diamond painting enthusiasts.

How Do I Choose My Next Diamond Painting?

Once you’ve completed your first project, you may find yourself ready to try something larger or more detailed.

When choosing your next project, consider:

  • The image you like
  • The size
  • The amount of detail
  • How much time you have available
  • The amount of workspace you have
  • Whether you want a small, medium or large project

Our guide to choosing the right diamond painting size explains how image detail, size and project time can affect your choice.

You can also explore our diamond art designs to find your next project.

Can I Turn My Own Photograph Into a Diamond Painting?

Yes.

Once you’re comfortable with the basic diamond painting process, you may want to create something more personal.

Diamond Art SA offers custom diamond paintings created from suitable photographs.

You could use a family photograph, pet photograph, special memory or another meaningful image.

If you’re considering a custom painting, choosing the right photograph and size is particularly important.

Frequently Asked Questions

Is diamond painting easy for beginners?

Yes. The basic process is simple to learn. You match the symbols on the canvas with the corresponding drill colours and place the drills onto the adhesive.

What should I do first when I open my diamond painting kit?

Find a clean workspace, lay your canvas flat, check the colour chart and organise your drills before beginning.

Should I remove all the plastic from my diamond painting?

No. It is better to expose only a small section at a time so that the remaining adhesive stays protected.

How do you pick up diamond painting drills?

Press the tip of the applicator pen into the supplied wax, then gently touch the waxed tip to the top of a drill.

How do you know where each diamond goes?

Each symbol on the canvas corresponds to a particular drill colour. Use the colour and symbol chart supplied with your painting to match the correct drill to each symbol.

Should I work one colour at a time?

You can. Many people find it convenient to complete one colour within a small section before moving onto another colour, but you can experiment and find the method that works best for you.

What happens if I make a mistake?

Carefully remove the incorrect drill and replace it with the correct one. Mistakes are normal, especially when you’re learning.

Can I stop my diamond painting and continue later?

Yes. Diamond paintings can be completed over multiple sessions. When you stop, protect the unfinished adhesive area and keep your drills organised.

How long does it take to complete a diamond painting?

It depends on the size, detail, number of colours and how often you work on it. A small project may be completed relatively quickly, while a large detailed painting can take much longer.

Ready to Start Your First Diamond Painting?

Diamond painting may look complicated when you first open a kit, but the basic technique is simple.

Prepare your workspace, organise your drills, expose a small section of the canvas, load your applicator with wax and start placing the drills one at a time.

Before long, the symbols will begin disappearing beneath colourful drills and your picture will start to appear.

If you are looking for your first project, explore Diamond Art SA’s range of diamond painting designs.

For more information about diamond painting, sizes, custom paintings and getting started, visit our Diamond Painting South Africa guide.

What Is Diamond Painting? A Complete Beginner’s Guide

If you have ever seen a sparkling diamond painting and wondered how it is made, you are not alone. Diamond painting is a creative craft that is easy to learn, requires no painting experience and can be enjoyed by both children and adults.

Whether you are completely new to the hobby or are thinking about buying your first diamond painting kit, this guide explains what diamond painting is, how it works, what you need to get started and how to choose your first project.

What Is Diamond Painting?

Diamond painting is a craft hobby where tiny resin diamonds, also called drills, are placed onto a specially printed adhesive canvas to create a sparkling picture.

The process is similar to a combination of paint-by-numbers and cross stitch. Instead of using paint or thread, you use small coloured resin drills. Each symbol on the canvas corresponds to a particular drill colour.

You gradually build the image by placing the drills onto the matching symbols. As more drills are added, the picture begins to appear.

The finished artwork has a colourful, sparkling appearance because the faceted surface of the resin drills reflects light.

How Does Diamond Painting Work?

The basic process is surprisingly simple.

A typical diamond painting kit contains a printed adhesive canvas, resin drills and the basic tools needed to place the drills. The canvas has a protective covering over the adhesive to keep it clean until you are ready to work on it.

You then:

  1. Choose a section of the canvas to work on.
  2. Peel back a small section of the protective covering.
  3. Find the symbol you want to work on.
  4. Check the colour chart to identify the correct drill.
  5. Pour a small number of drills into the tray.
  6. Press the applicator pen into the wax.
  7. Use the pen to pick up a drill.
  8. Place the drill onto the matching symbol.
  9. Continue working through the section.
  10. Move onto the next section until your painting is complete.

It is essentially a pick, place and repeat process. Once you get started, the technique becomes much easier and more natural.

What Comes in a Diamond Painting Kit?

The exact contents can vary depending on the supplier and product, but a basic diamond painting kit generally includes:

  • An adhesive diamond painting canvas
  • Coloured resin drills
  • An applicator pen
  • Wax
  • A diamond painting tray
  • A colour/symbol chart or key

Some projects may also include additional tools or accessories.

You don’t need a large collection of equipment to start diamond painting. The basic tools supplied with a kit are enough to get you started.

As you become more experienced, you may decide to add accessories such as storage containers, tweezers, multi-placer tools or a light pad.

What Are Diamond Painting Drills?

The small “diamonds” used in diamond painting are usually called drills.

They are small resin pieces with a faceted top that creates the sparkling effect associated with diamond art.

Drills are available in different colours and can be either round or square, depending on the particular diamond painting.

At Diamond Art SA, our diamond art paintings currently use round drills.

Round drills are circular and are placed onto the corresponding symbols on the adhesive canvas. They are a popular choice for diamond painting and are straightforward to work with, especially for beginners.

Is Diamond Painting Difficult?

One of the reasons diamond painting is so popular is that the basic technique is easy to learn.

You don’t need to know how to draw or paint, and you don’t need previous crafting experience.

The challenge usually comes from the amount of time required rather than the technique itself. A small, simple painting can be much quicker to complete than a large, highly detailed design.

If you are a complete beginner, starting with a smaller project can be a great way to learn how everything works before moving onto a larger painting.

How Do You Start Your First Diamond Painting?

Before you begin, find a clean, flat workspace where you can comfortably work on your canvas.

Step 1: Prepare Your Workspace

Make sure you have enough room for your canvas, drills, tray and tools.

Good lighting is also important because you need to be able to see the small symbols on the canvas clearly.

Step 2: Understand Your Colour Chart

Look at the symbol and colour chart supplied with your painting.

Each symbol corresponds to a particular drill colour. Take a little time to familiarise yourself with the chart before you begin.

Step 3: Work on a Small Section

Avoid removing the entire protective covering from the canvas at once.

Instead, expose a manageable section and keep the rest covered. This helps protect the adhesive from dust and other debris while you work.

Step 4: Prepare Your Drills

Place a small quantity of the colour you are working with into your tray.

Gently shake the tray so that the drills settle into position and are easier to pick up with your applicator.

Step 5: Load Your Applicator

Press the tip of your applicator pen into the wax.

The wax gives the tip enough grip to pick up an individual drill.

Step 6: Pick Up and Place the Drills

Touch the waxed pen to the top of a drill, then place the drill onto the matching symbol on your canvas.

Press gently so that it sticks to the adhesive.

Continue placing drills until the section is complete.

Step 7: Continue Section by Section

Once you have completed one area, move onto another section of the canvas.

Slowly, the individual drills will come together to create the finished image.

If you’re unsure what size painting to choose, read our guide to choosing the right diamond painting size.
How Should Beginners Choose Their First Diamond Painting?

Your first diamond painting doesn’t have to be huge.

In fact, a smaller or simpler design can be a good way to learn the basic technique without committing to a very large project.

When choosing your first painting, consider:

  • The size of the artwork
  • How much detail the image contains
  • How much time you have available
  • Whether you prefer simple or detailed designs
  • Whether you want to complete the project relatively quickly

If you are unsure what size would work best, our Diamond Painting South Africa guide contains more information about choosing the right size and getting started with diamond painting.

You can also explore our small diamond painting projects if you are looking for a smaller project.

How Long Does Diamond Painting Take?

There is no standard amount of time required to complete a diamond painting.

Completion time depends on:

  • The size of the painting
  • The amount of detail
  • The number of colours
  • How quickly you place the drills
  • How often you work on the project
  • Your experience level

A small project might be completed relatively quickly, while a large, detailed painting can become a long-term project that you work on over many sessions.

One of the enjoyable parts of diamond painting is that you can work at your own pace.

What Size Diamond Painting Should You Choose?

Size is particularly important when choosing a diamond painting.

A larger image generally gives the artwork more room to represent fine details. This becomes especially important when the design includes faces, animals, small features or complicated backgrounds.

A smaller image may be suitable for a simpler design, while a highly detailed image may benefit from a larger size.

If you are choosing a custom diamond painting from your own photograph, size becomes even more important because the photograph needs enough space for the important details to be represented.

For more information, read our guide to Diamond Painting in South Africa.

Can You Turn Your Own Photo Into a Diamond Painting?

Yes!

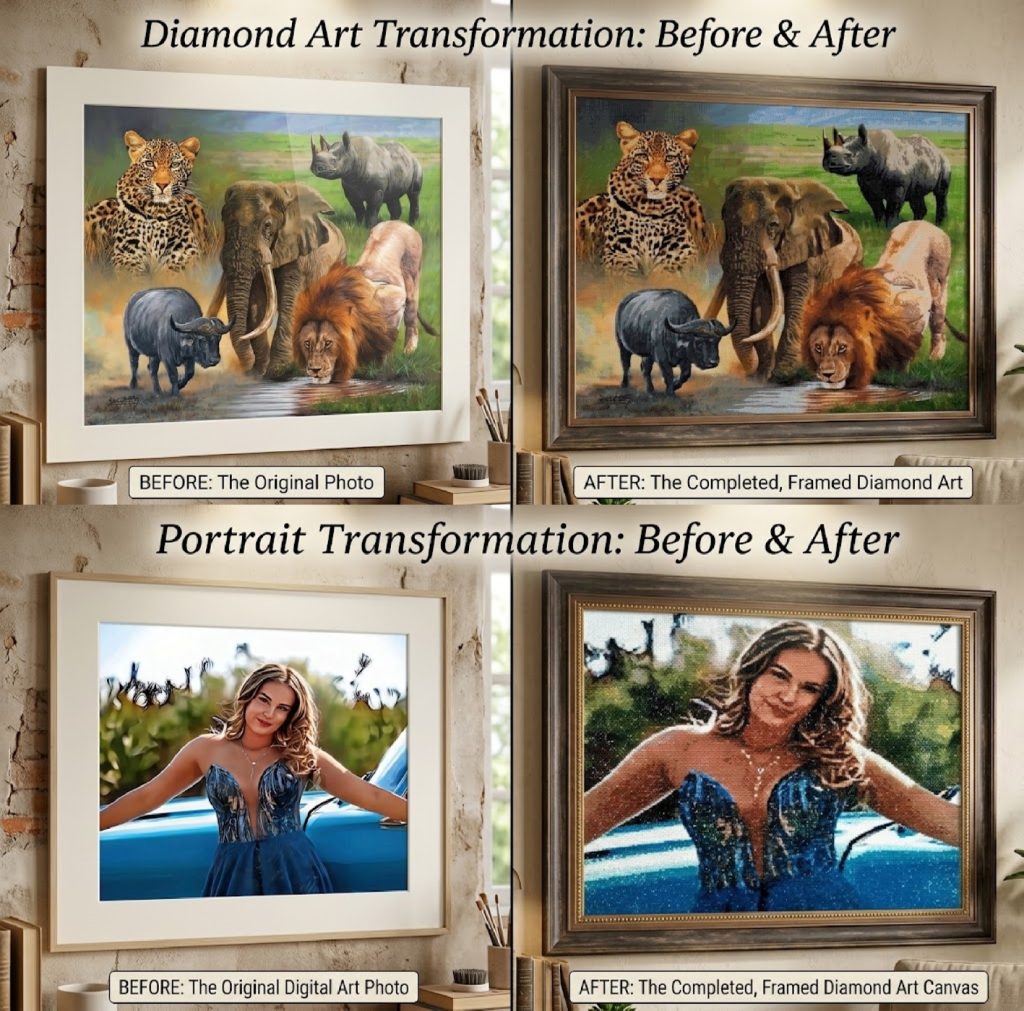
One of the most exciting options available to diamond painting enthusiasts is creating a custom painting from your own photograph.

You could use:

  • A family photograph
  • A photograph of your pet
  • A favourite holiday memory
  • A special person
  • A wedding photograph
  • A landscape
  • Another meaningful image

Diamond Art SA offers custom diamond paintings created from customers’ own photographs.

For the best results, photographs should generally be clear, well-lit and contain enough detail for the main subject to be reproduced effectively.

When creating a custom diamond painting, it is also important to understand that a photograph contains millions of colours, while diamond painting uses a limited selection of drill colours. The finished artwork therefore won’t be an exact photographic reproduction when viewed close up.

Instead, the individual coloured drills work together to recreate the overall image.

Is Diamond Painting Suitable for Children?

Diamond painting can be an enjoyable creative activity for children, but the small size of the drills means that parents should consider the child’s age and ability when choosing a project.

For younger children, a smaller and simpler design can be easier to manage than a large, highly detailed painting.

Diamond Art SA offers small and children’s diamond painting projects that can be suitable options for younger crafters.

Always supervise young children appropriately because the drills are small pieces.

Tips for Your First Diamond Painting

Here are a few simple tips that can make your first project easier:

Keep the protective cover on

Only expose the area you are currently working on. Keeping the rest covered helps protect the adhesive.

Don’t pour too many drills into your tray

Work with a manageable amount at a time. This makes it easier to handle the drills and reduces the chance of spills.

Keep your drills organised

If you have several colours, keep the bags or containers clearly labelled so that you can easily identify the colour you need.

Take your time

There is no need to rush. Diamond painting is a project you can work on a little at a time.

Start small

If this is your first project, a smaller design can help you become comfortable with the tools and process.

Don’t worry about perfection

Your first few rows may not look perfect, and that’s completely normal. Your technique will improve as you continue.

What Can You Do With a Finished Diamond Painting?

Once you have completed your painting, you can display it as artwork in your home, give it as a gift or keep it as a reminder of the time you spent creating it.

Before displaying your finished painting, check that all the drills are properly placed and that there are no obvious missing pieces.

If you want additional protection for your finished artwork, diamond painting sealer can also be used according to the product’s instructions.

Where Can You Buy Diamond Painting in South Africa?

If you’re looking for diamond painting in South Africa, Diamond Art SA offers a range of options for beginners and experienced crafters.

Our range includes:

You can explore our diamond art designs or visit our Diamond Painting South Africa guide for more information about choosing a painting and getting started.

Frequently Asked Questions

Do I need artistic experience to do diamond painting?

No. Diamond painting does not require drawing or painting skills. You simply follow the symbols on the canvas and place the corresponding drills.

What are diamond painting drills?

Drills are the small resin pieces that are placed onto the adhesive canvas to create the finished artwork.

What tools do I need for diamond painting?

A basic project requires a diamond painting canvas, drills, applicator pen, wax and tray. Additional accessories are optional.

Are diamond paintings suitable for beginners?

Yes. Diamond painting is relatively easy to learn, and beginners can start with a small or simple design before progressing to larger projects.

Can I make a diamond painting from my own photo?

Yes. Diamond Art SA offers custom diamond painting services that allow you to turn a suitable photograph into a diamond-art design.

What size diamond painting should a beginner buy?

There is no single correct size. Smaller projects can be easier for beginners because they generally require less time to complete. The best size also depends on the detail in the image.

Does Diamond Art SA deliver in South Africa?

Yes. Diamond Art SA supplies diamond painting products to customers throughout South Africa.

Ready to Try Diamond Painting?

Diamond painting is a simple craft that can turn a printed design into a sparkling piece of artwork, one drill at a time.

Whether you want to try a small beginner project, create a large statement piece or turn a favourite photograph into a custom diamond painting, there are many different ways to enjoy the hobby.

Explore Diamond Art SA’s diamond painting designs and find a project for your next creative session.

If you’re not sure where to begin, you can also visit our Diamond Painting South Africa guide for more information.